
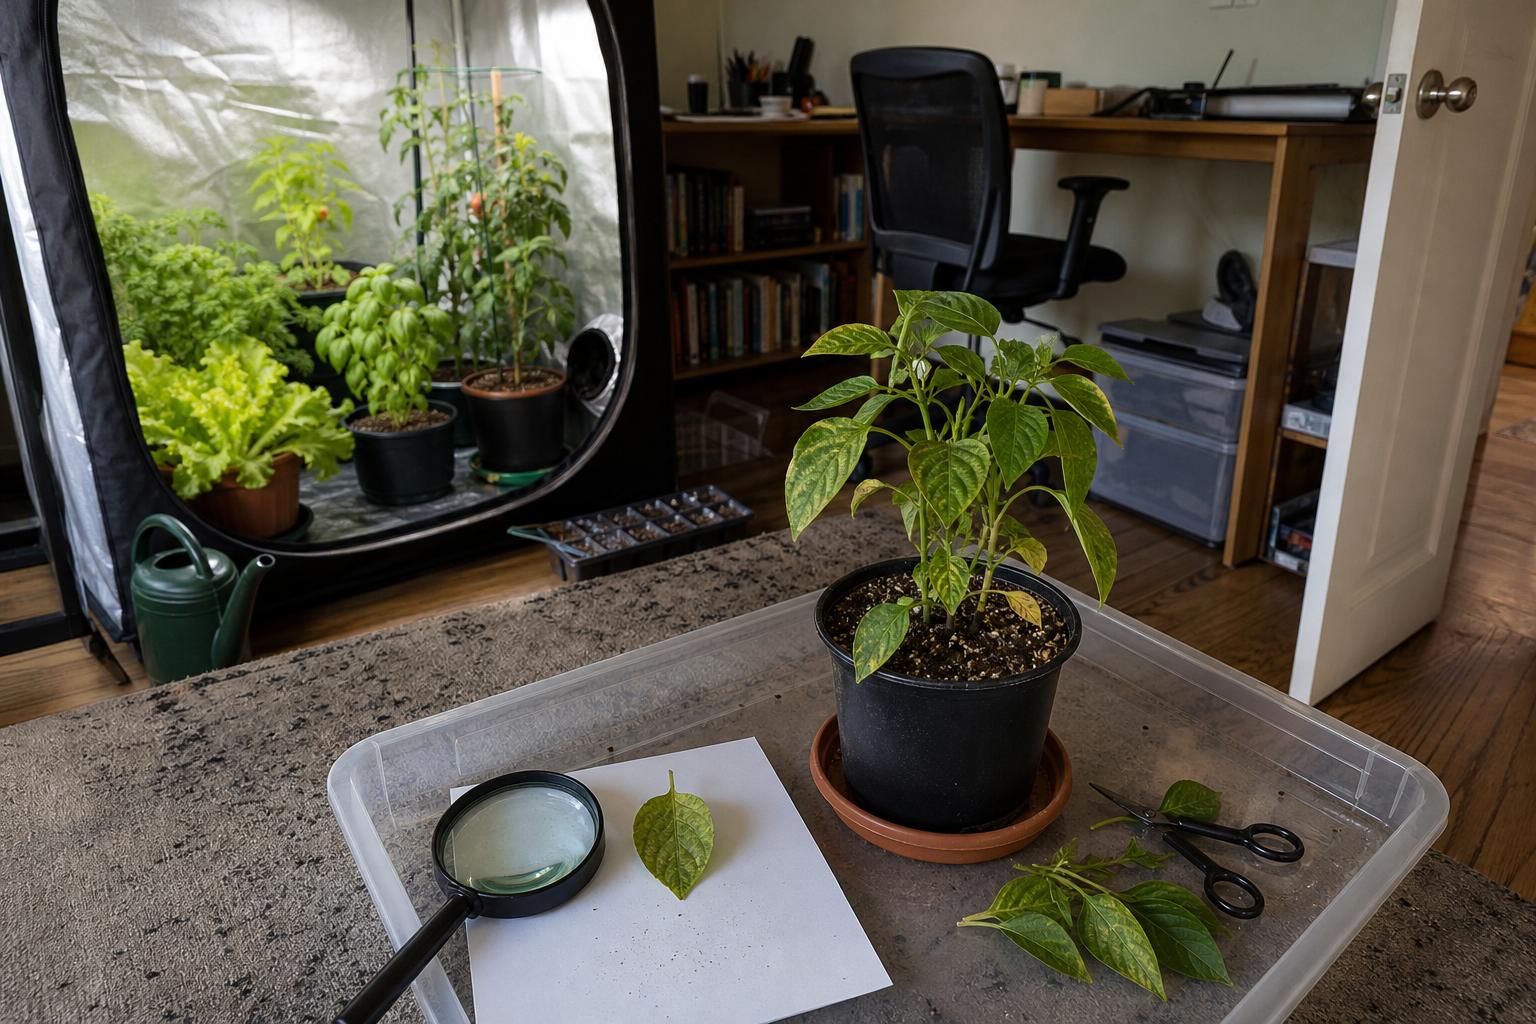
Spider mites are much easier to stop when they are still confined to one plant inside your grow tent. The trouble is that their earliest signs look minor. A few pale dots on a pepper leaf can easily be blamed on lighting, nutrients, or an old leaf beginning to fade.
Inside a grow tent, waiting for obvious webbing is a costly mistake. Plants sit close together, leaves touch, and circulating fans keep air moving across the canopy. By the time fine webs appear between leaves, the mites may already be feeding on several plants.
I learned this after dismissing faint spotting on a pepper plant as a nutrient issue. I adjusted the feed, waited, and lost valuable time. Since then, I have relied on a short inspection routine rather than waiting for plants to look sick.
The First Spider Mite Signs Most Growers Miss
The first sign is usually tiny pale specks on the upper leaf surface. This damage is often called stippling, but the name matters less than the appearance. The leaf looks as though someone tapped it repeatedly with the tip of a very fine needle.
On dark pepper, basil, bean, and tomato leaves, the spotting can be fairly easy to notice under the grow light. On pale lettuce or older cucumber leaves, it may blend into the natural color of the leaf.
Look for these changes inside the grow tent:
- Clusters of pale pinpoints rather than one solid yellow patch
- A dull or dusty appearance on leaves near the middle of the canopy
- Fine tan specks on the underside of a leaf
- Leaves curling slightly at the edges without being dry
- Damage that appears on one plant before neighboring plants
Webbing is a late sign, not an early warning.
One mistake I see often is checking only the newest growth. Spider mites frequently establish themselves on mature leaves where the canopy is warm and relatively undisturbed. In my grow tents, the first suspicious leaves have often been halfway down a pepper or tomato plant, especially where one leaf rests against another.
How to Inspect Every Risk Area Inside the Grow Tent
You do not need expensive equipment. I prefer a small hand lens with strong magnification and a bright flashlight. A phone camera can help, but it often struggles to focus on something as small as a mite. A simple hand lens is faster, cheaper, and easier to keep beside the grow tent.
Turn off the circulation fan for a few minutes before inspecting. Moving leaves make tiny mites almost impossible to see. Keep the exhaust system running if the grow tent needs it for heat control, but pause any fan blowing directly across the plants.
Start With the Most Likely Entry Points
Spider mites rarely appear evenly across a grow tent. Begin with plants that were recently added, plants nearest the tent door, and plants whose leaves touch the wall or another plant.
I have noticed that dense basil and mature pepper plants deserve extra attention. Their overlapping leaves create many protected surfaces that are easy to miss during normal watering.
- Check the plant nearest the grow tent entrance.
- Inspect any recently introduced seedling or herb.
- Look beneath mature leaves in the middle canopy.
- Examine leaves touching neighboring plants.
- Check stressed plants that have been dry or unusually warm.
Use one hand to support the leaf and shine the flashlight across it from the side. Side lighting reveals texture and movement better than light aimed straight down. Then turn the leaf over and inspect along the main vein and smaller veins.
Do not forget the corners of the grow tent canopy. Warm, dry areas near a light or a steady stream of fan air can support rapid mite activity. Check behind plant ties and where leaves press against the reflective wall.
Make Inspection Easy Enough to Repeat
Pulling every plant out of a crowded grow tent gives you a better view, but it also takes time and can brush mites onto clothing or nearby houseplants. My preference is to inspect plants inside the grow tent first. Place a clean tray under the plant if you need to rotate a small pot.
This is the practical tradeoff. A complete inspection outside the tent may be more comfortable, but a quick inspection that you actually repeat is more useful. For a small home grow tent, five focused minutes every few days is usually more realistic than a major weekly teardown.
Confirming Spider Mites Before You Start Treatment
Pale spots can also come from thrips, feeding problems, or leaf stress. Before spraying anything around edible crops, confirm that something is actually moving.
Hold a sheet of plain white paper beneath a suspicious leaf and tap the leaf firmly. Wait several seconds, then watch the specks on the paper. Spider mites look like tiny moving dots. They may appear tan, reddish, greenish, or nearly translucent.
Next, use the hand lens on the underside of the leaf. Look for:
- Slow moving dots with rounded bodies
- Clear or pale round eggs attached near leaf veins
- Fine strands of silk close to the leaf surface
- Empty pale skins left behind as mites develop
Sticky cards are not a reliable early detection tool for spider mites. They are useful for flying pests inside a grow tent, but mites spend most of their time on the plant. Direct leaf inspection works better.
If nothing moves, mark the suspicious leaf with a loose plant tie and inspect it again the next day. Avoid spraying every plant based on one damaged leaf. Sprays add moisture to the grow tent, can mark tender greens, and may harm beneficial organisms if you use them.
What to Do Immediately When You Find Them
Once you confirm spider mites, stop moving between plants. Do not inspect the affected pepper and then push your hands through the lettuce canopy. Mites can travel on sleeves, tools, and leaves.
Take these steps in order:
- Turn off circulation fans so loose mites are not disturbed while you work.
- Cover the affected plant with a clean bag before removing it from the grow tent.
- Move it away from the tent and from houseplants.
- Remove badly damaged leaves and seal them in a bag.
- Wash your hands and clean scissors before touching other plants.
- Inspect every neighboring plant, including leaf surfaces that were touching.
If you have nowhere to isolate a large plant, keeping it in a corner of the same grow tent is not true isolation. In a small apartment, I would rather remove one heavily infested herb plant than risk a tent full of peppers, lettuce, and basil. Saving every plant is not always the practical choice.
For a light infestation on a valuable plant, rinse leaf undersides carefully and use a product specifically labeled for spider mites and the edible crop you are growing. Follow the label, including harvest timing. One application is rarely enough because eggs may survive, so continue inspections rather than assuming the problem is solved.
Before closing the grow tent, wipe down the nearby floor, tray edges, and tools. Then inspect the remaining plants again in two or three days. I would personally start with the plant nearest the original infestation and work outward without letting leaves brush against my clothing.
Put a hand lens beside your grow tent today and check five mature leaves from each plant. That small routine is far easier than treating an entire enclosed canopy after webbing appears.


