
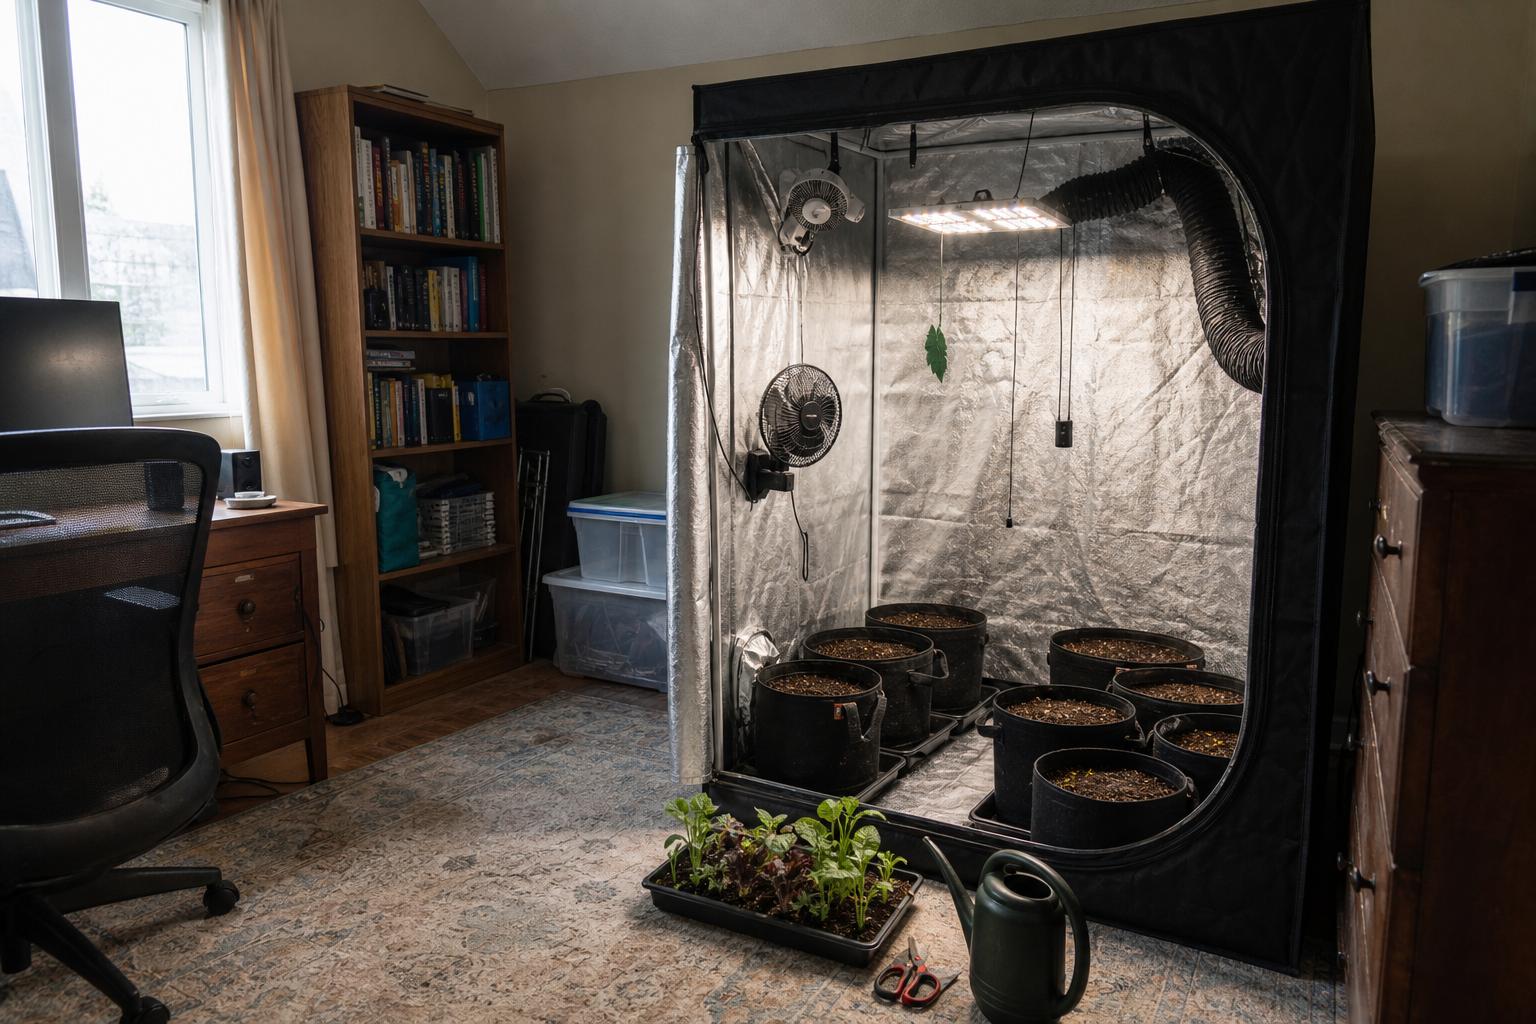
A new grow tent can look ready long before it actually is. The light turns on, the fan spins, and the zipper closes, so it is tempting to fill every open spot with seed trays and young plants.
But a grow tent is not just a collection of equipment. It is a small controlled environment where lighting, ventilation, airflow, containers, and plants all affect one another. Testing the whole system before planting is much easier than correcting heat, access, or space problems around stressed lettuce and crowded tomato plants.
I learned this after setting up grow tents that looked perfectly organized while empty. Once containers, saucers, cords, and plants went in, the useful space became much smaller. A fan that seemed quiet also became annoying when it ran beside a living area all evening.
Choose Crops for the Tent You Actually Have
Start with the inside dimensions of your grow tent, but do not treat every inch as growing space. The light occupies height. Containers occupy height. You also need distance between the light and the plant canopy.
A compact tent can produce plenty of basil, cilantro, lettuce, spinach, arugula, and other leafy greens. It can also handle compact peppers or dwarf tomatoes, but those plants demand more vertical room and stronger lighting.
Plant labels rarely describe indoor tent behavior. A tomato listed as compact can still spread sideways once it receives steady light and warmth. Basil can become a broad shrub if harvested regularly. Mature width matters just as much as mature height.
Before buying seeds, subtract space for:
- The container and saucer
- The light fixture and hanging hardware
- Safe clearance below the light
- An oscillating fan or circulation fan
- Room to reach the back containers
My preference for a first grow tent is to begin with leafy greens and herbs, then add one compact fruiting plant if space allows. Filling a tent with tomatoes and peppers sounds productive, but slow access and crowding often reduce plant health and make watering unpleasant.
Run the Empty Grow Tent Before Planting
Set up the grow tent exactly as you intend to use it. Hang the light, connect the exhaust fan and filter if you use one, install circulation fans, and place empty containers or boxes where the plants will sit.
Then run everything through a complete light cycle. I prefer at least one full day and one full night. This reveals changes that a short equipment test will miss.
- Turn the light on at the planned time.
- Run the exhaust fan at a realistic speed.
- Close the grow tent completely.
- Check temperature and humidity several times.
- Stand in the room and listen for vibration or irritating fan noise.
- Check the room again after the light has been off for several hours.
Pay attention to the room outside the grow tent too. Exhaust heat and moisture do not disappear. In an apartment or smaller home, they enter the same room unless air is directed elsewhere.
The room is part of the system.
One mistake I made early on was testing an exhaust fan at maximum speed and assuming I was finished. Maximum speed controlled the heat, but the noise was not something I wanted in my home every day. What worked better was improving the duct path and using a slightly lower fan setting that I could live with continuously.
Check Conditions Where the Leaves Will Be
A sensor hanging near the top of a grow tent tells you what is happening near the top. It does not necessarily tell you what lettuce leaves or basil seedlings will experience.
Place the temperature and humidity sensor at the expected canopy height. If you plan to grow plants of different sizes, take readings at more than one level. Hot air often collects above the light, while damp air can linger around closely spaced containers below.
Sensor placement should follow the plants as they grow. Keep the sensor shaded from direct light and away from the immediate breeze of the circulation fan. Direct light can warm the sensor body, while strong fan airflow may produce a reading that does not represent the rest of the grow tent.
Look for airflow, not wind
Inside a grow tent, circulation should gently move leaves without constantly bending stems. Before plants arrive, hang strips of lightweight tissue at planned canopy height. They should move in several areas rather than only in front of the fan.
I have noticed that the back corners and the space below a dense canopy become stale first. A fan aimed straight across the top can leave those lower areas untouched.
Try these adjustments before buying another fan:
- Aim the fan across a wall so air spreads more softly
- Move it above or beside the canopy instead of directly in front
- Clear containers away from passive intake openings
- Reduce sharp bends in the exhaust duct
Do not chase violent leaf movement. Strong airflow can dry young greens, increase watering work, and create uneven conditions across a small grow tent.
Check the usable light area
The brightest part of a grow tent is usually the center beneath the fixture. The edges may receive much less light even when the reflective walls make the space look bright.
If you have a reliable light meter, measure at canopy height. If not, check the fixture coverage information and plan conservatively. Put fruiting peppers or dwarf tomatoes nearer the stronger center area. Lettuce, parsley, and other less demanding crops can use the outer area.
My practical preference is to use a slightly smaller, evenly lit canopy rather than squeezing containers into every corner. Extra plants in weak light tend to stretch into neighboring plants and block airflow.
Arrange Containers for Growth and Maintenance
Now place the actual containers and saucers inside the grow tent. Fill them with dry growing medium if possible, since this gives you a more honest picture of their size and weight.
Close the tent, then practice the jobs you will repeat:
- Reach every container without leaning on another plant
- Lift each pot to judge moisture by weight
- Remove runoff from every saucer
- Adjust the light without moving the entire garden
- Inspect the back and underside of the future canopy
Where do most growers go wrong? They arrange containers for maximum capacity instead of easy weekly maintenance. The back corner becomes hard to water, so it gets checked less often. That is where drooping plants, spilled water, and unnoticed pests tend to appear first.
Leave a narrow access gap if the grow tent is deep enough to require it. In very small tents, use removable trays so several containers can slide forward together. Keep electrical connections raised away from possible runoff.
Also picture each crop at maturity. Leaves will extend beyond pot rims, and tomatoes or peppers may need supports. Make sure opening the grow tent door will not crush foliage or knock over a stake.
Make One Empty Run Before You Commit
Once the layout feels workable, run the complete grow tent again with containers in place. Containers change airflow, and damp growing medium will later add humidity. If the empty setup is already too warm, noisy, crowded, or difficult to reach, plants will not improve it.
If I were setting up the grow tent today, I would first remove one container from the planned layout. That small sacrifice usually improves airflow, light distribution, and access more than expected. Then I would run the system for a full cycle and record conditions at canopy height.
Your next step is not planting. Turn on the finished grow tent, close it, and live with it for a day. Fix the loud fan, blocked intake, hot corner, weak light edge, or unreachable saucer now. Seeds can wait until the space works as one manageable system.


