
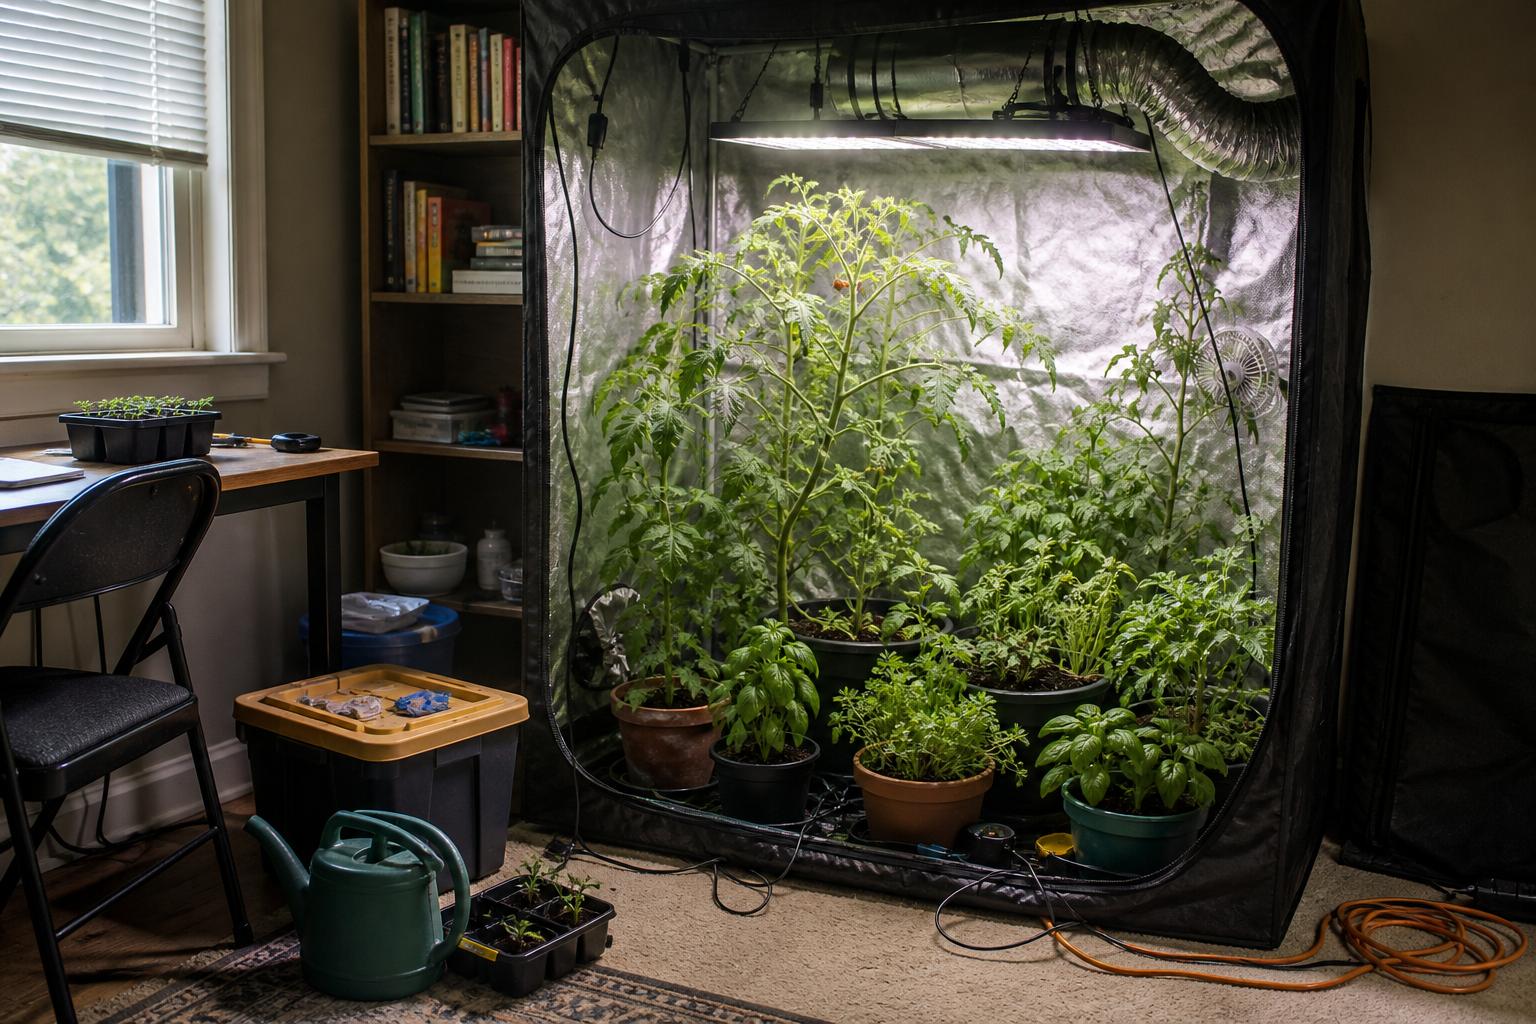
My first grow tent was not difficult because growing food indoors is unusually complicated. It was difficult because I filled a small space with too much equipment, too many plants, and too many things I felt compelled to adjust.
Instead of creating a stable grow tent for herbs and leafy greens, I created a cramped little machine that demanded attention every day. I could not reach the plants in the back without moving the front ones. Cords crossed the floor. Fans occupied useful growing space. Every yellow leaf sent me searching for another setting to change.
The lesson that took me longest to learn was that a grow tent becomes easier to control when fewer things compete for space and attention.
Why My First Grow Tent Became Harder Than Necessary
Beginners are often encouraged to prepare for every possible problem before the first seedling enters the tent. That sounds sensible, but it can lead to buying equipment without knowing whether the grow tent actually needs it.
One mistake I made early on was trying to use every available inch of floor space. Small basil and lettuce seedlings made the tent look empty, so I added more containers. A few weeks later, those plants touched each other, blocked airflow, and hid spilled water and fallen leaves.
I have noticed that plant access becomes a limiting factor before floor space does. A grow tent can technically hold twelve containers while being practical to maintain with only eight. The smaller number often produces healthier plants because each one can be inspected, watered, and harvested without rearranging the entire tent.
Before adding another plant, ask whether you can comfortably do these things:
- Reach the growing medium with your hand
- See the lower leaves and stems
- Remove the runoff tray without lifting another container
- Clean the grow tent floor
- Adjust the light without brushing against plants
If not, the grow tent is already full, even if some floor remains visible.
The Equipment and Placement Mistakes That Created Daily Problems
More equipment can provide more control, but it also introduces heat, noise, cords, cleaning, and additional settings. In an apartment or small home, those costs matter. A loud fan heard from the next room is not a minor detail when it runs all day.
My preference is to begin with a dimmable light, an exhaust fan, one circulation fan, and reliable temperature and humidity monitoring. I add equipment only when repeated observations show a need for it.
For example, many small grow tents do not need an active intake fan. An exhaust fan can pull fresh room air through the lower vents. Adding an intake fan may increase noise and electricity use without noticeably improving lettuce, parsley, basil, or other compact crops.
Keep equipment out of the growing path
I once positioned a circulation fan where it worked perfectly while the plants were small. As the leafy greens expanded, the closest leaves were pushed constantly while the plants behind them barely moved. I had designed airflow for seedlings instead of mature plants.
Place fans for the size the plants will become. Gentle leaf movement across the grow tent is more useful than a strong blast aimed at one container. Clip fans should also be reachable without leaning over tender stems.
Keep power connections raised from the floor and away from runoff trays. Route cords along tent poles when possible. This is safer, but it also makes cleaning much less annoying.
Leave vertical room before you need it
Tomatoes and peppers can close the gap to a light surprisingly quickly. The light itself, hangers, exhaust ducting, and container height all subtract from the advertised height of a grow tent.
Usable plant height is always less than tent height.
For a beginner, I would choose compact peppers, dwarf tomatoes, herbs, and cut and come again leafy greens rather than trying to force tall plants into a short tent. The tradeoff is a narrower crop selection, but the reward is easier light control and far less pruning.
Why Constant Adjustments Made Problems More Confusing
A drooping plant can tempt you to change the light height, fan speed, watering schedule, and nutrient strength at once. Then the plant improves or declines, and you have no idea which adjustment mattered.
I learned this after repeatedly responding to the appearance of leaves without checking the growing medium. Inside a grow tent, warm air and moving fans can make the surface look dry while moisture remains deeper in the container. Adding water based only on the surface can leave roots wet for days.
Check conditions before changing equipment. When a vegetable or herb looks wrong, I work through a simple sequence:
- Feel the growing medium below the surface and lift the container if possible.
- Check recent temperature and humidity readings, not just the current number.
- Look for insects, damaged stems, spots, or discoloration under the leaves.
- Confirm that the light distance and timer have not changed.
- Make one reasonable adjustment and observe the plant.
This slower approach can feel uncomfortable when a plant looks unhappy, but it creates useful information. Lettuce that perks up after watering tells you something. Lettuce that receives water, stronger airflow, and a dimmer light all at once tells you very little.
One mistake I frequently see is chasing a perfect temperature or humidity number every hour. Grow tents naturally fluctuate when lights switch, doors open, or the surrounding room changes. A stable acceptable range is more useful than a perfect momentary reading.
The Routine I Would Recommend to a Beginner
A manageable grow tent does not need constant attention. It needs a repeatable routine that catches small problems before they spread.
Here is the routine I use as a practical starting point:
- Each day: Look at leaf posture, check that fans and lights are running, and inspect the tent floor for water.
- Before watering: Check moisture below the surface and compare the weight of containers.
- Twice a week: Look beneath leaves, remove damaged growth, and rotate containers if light coverage is uneven.
- Once a week: Wipe spills, empty standing runoff, review recent temperature and humidity, and check whether plants are crowding equipment.
- Between crops: Clean trays, fan guards, tent walls, and tools before bringing in new seedlings.
I prefer scheduled inspections over reacting every time I walk past the grow tent. This reduces unnecessary adjustments and makes changes easier to evaluate. It also keeps indoor growing from becoming an endless household chore.
Keep a short record of watering, feeding, and major equipment changes. It does not need to be a detailed journal. A note on your phone is enough. When basil begins paling or pepper leaves curl, you can check what changed instead of relying on memory.
What I Would Change First in a Difficult Grow Tent
If your grow tent currently feels crowded, noisy, or impossible to balance, do not buy another device yet. Remove one unnecessary complication first.
Take out empty containers and equipment that is not solving a measured problem. Create a clear path to every plant. Raise electrical connections, reposition the circulation fan for gentle movement, and give mature leaves room to expand.
Then leave the main settings alone for several days while recording what you see. That quiet observation period is often more useful than another fan, sensor, or bottle of nutrients.
My practical next step would be to stand in front of the grow tent with the door open and identify the plant that is hardest to reach. Fix access to that plant first. A grow tent that is easy to maintain is much easier to grow food in, and that simple change will improve nearly every task that follows.


