
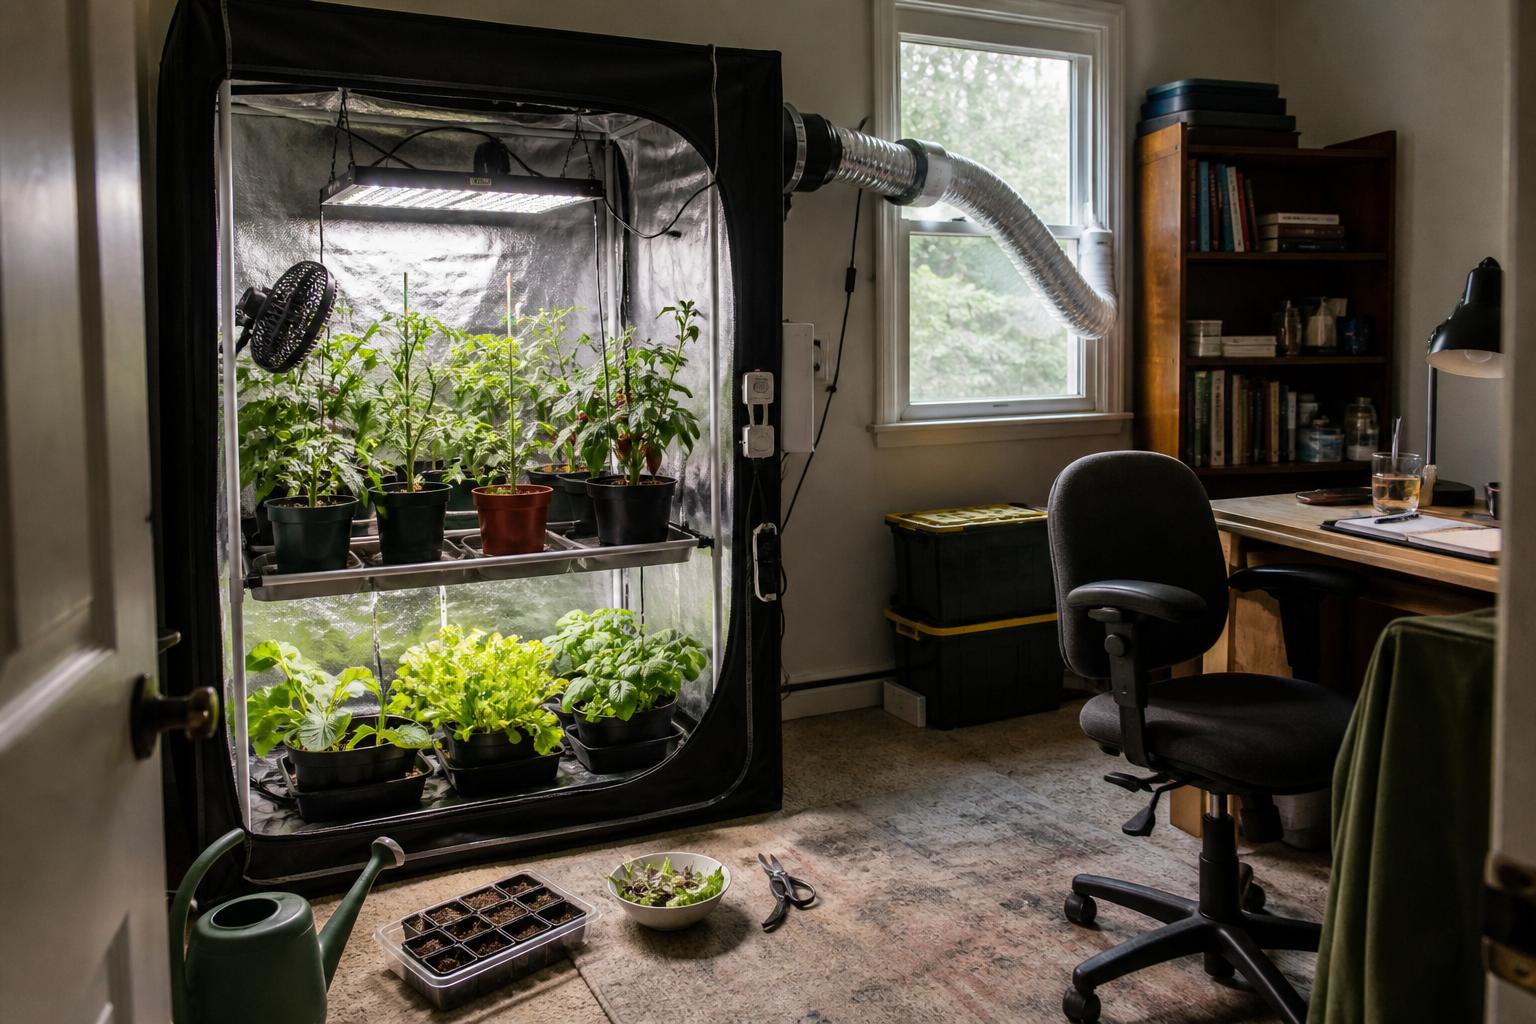
If I were building a grow tent from scratch today, I would spend less time comparing complete kits and more time studying the room where the tent will operate. A grow tent is not an isolated box. It pulls air from the room, releases heat back into that room, makes noise, uses electricity, and needs enough surrounding space for maintenance.
I would also decide what I wanted to grow before buying the grow tent. Lettuce, basil, and other compact greens can thrive under modest lighting in a short tent. Fruiting peppers and tomatoes need more height, stronger light, larger containers, and better heat removal. That one decision changes nearly every purchase that follows.
Start With the Space Outside the Grow Tent
Measure the available floor area, ceiling height, doorway, and the path the boxed tent must travel through. Then leave room to open the tent and reach the plants. A tent that technically fits between two walls can still be miserable to use if the door cannot open fully or the back plants are impossible to reach.
I prefer a slightly smaller grow tent with comfortable access over the largest model that can be squeezed into a room. In a smaller home, convenience matters. If watering requires moving furniture and climbing around equipment, the garden becomes harder to maintain.
Check the electrical situation before choosing a light. Find out what else runs on the same circuit, especially heaters, air conditioners, computers, or kitchen appliances. Add the expected wattage of the grow light, exhaust fan, circulation fans, and any pumps. If you are uncertain about the circuit, ask a qualified electrician rather than guessing.
Also consider where the tent air will go. An exhaust fan does not make heat and moisture disappear. It simply moves them from the grow tent into the surrounding room unless the duct leads somewhere else. I have noticed that a tent near a window or a room ventilation path is much easier to manage than one tucked inside a closed closet.
Choose the Plants Before the Equipment
For a first grow tent, I would choose one general type of crop rather than trying to grow everything at once. Leafy greens and herbs are the easiest place to start because they stay compact and tolerate moderate light. Peppers are also manageable, but they occupy more vertical space and remain in the tent much longer.
Full size tomatoes would not be my first choice for a small grow tent. They can be grown successfully, but the combination of height, pruning, support, container size, and strong lighting makes the setup less forgiving. Compact tomatoes are more realistic if tomatoes are a priority.
Make a simple plant plan before shopping. Decide how many containers will fit, how tall the mature plants should become, and whether the crop needs shelves or open vertical space. This prevents buying a tent that looks spacious while empty but becomes crowded as soon as containers, fans, and mature leaves are added.
Buy the Core Grow Tent Equipment in This Order
The tent itself
Choose the grow tent only after measuring the room and planning the crop. Look for sturdy poles, usable vent openings, a removable floor tray, and doors that match how you will approach the plants. Extra height is usually more useful than a small increase in floor area, especially for peppers and compact tomatoes.
The grow light
Buy a quality LED fixture that fits the tent footprint and can be dimmed. Dimming is valuable because young greens need less light than mature peppers. It also lets you reduce heat and electricity use instead of raising an overly powerful fixture to the top of the grow tent.
One mistake I made early on was treating the light as a separate purchase from ventilation. A powerful light may promise better growth, but it also creates more heat that the exhaust system and room must handle.
The exhaust fan and filter
Match the exhaust fan to the grow tent size, duct length, and expected light heat. I prefer an adjustable inline fan rather than a fixed speed model. It can run quietly for lettuce and basil, then move more air when peppers fill the tent.
A carbon filter is optional for most edible crops. Basil, tomatoes, nutrient solutions, and damp growing media can produce noticeable smells, so a filter may still be worthwhile in a shared apartment. I would not automatically buy one if odor is not a concern because it adds cost and reduces airflow.
Circulation fans
Add one or two small fans inside the grow tent to keep air moving through the leaves. I prefer gentle movement from different angles rather than one powerful fan blasting the nearest plant. Leaves should flutter slightly, not fold or dry around the edges.
Containers, trays, and growing medium
Choose these after arranging the major equipment. Use waterproof trays under every container, even if the grow tent includes a floor liner. Spilled water has a way of finding zipper seams and cable openings.
Basic controls and monitoring
Start with a reliable light timer, a temperature and humidity meter, and an inexpensive power meter if you want to track electricity use. Mount power connections above floor level, keep them away from watering areas, and form drip loops in cords so water cannot run toward plugs.
Match Lighting and Ventilation Before Adding Automation
Set up the empty grow tent and run the light, exhaust fan, and circulation fans for several hours. Keep the tent in the same room and under the same conditions you expect during a normal grow. Check temperature and humidity inside the tent, then check the surrounding room.
This test tells you more than equipment labels. If the tent becomes hot, first increase exhaust airflow, shorten restrictive ducting, or reduce the light output. If the room itself keeps getting warmer, a larger grow tent fan will not solve the underlying problem. The room needs a better way to release heat.
What surprised me most in smaller grow tents was how often quiet operation mattered more than maximum fan power. An oversized fan running slowly is often easier to live with than a small fan running at full speed. It also leaves some extra capacity for warm days and mature plants.
What I Would Delay Until the Grow Tent Proves It Needs It
I would delay automated watering, humidifiers, dehumidifiers, environmental controllers, cameras, carbon dioxide equipment, and complex sensor systems. These products can be useful, but they should solve a measured problem rather than an imagined one.
I frequently see new growers buy a humidifier before learning how much moisture mature leafy greens release inside a grow tent. A tent that seems dry with seedlings can become humid once the canopy fills in. Adding equipment too early can create another issue to manage.
I would also wait before buying shelving, trellis nets, or large plant supports. Shelves make sense for short herbs and greens, while nets are more useful for peppers or tomatoes. Let the chosen crop determine those purchases.
The First Step I Would Take Today
Before placing an order, I would mark the proposed grow tent footprint on the floor, confirm the door can open, locate the electrical outlet, and write down the crops I actually plan to grow. Then I would choose the tent, dimmable light, and adjustable exhaust fan as one matched system.
That approach is less exciting than filling a cart with automation, but it builds a grow tent that is easier to cool, quieter to live beside, safer to water, and much more likely to produce healthy food.


